Last updated on October 21st, 2026 at 08:46 am
Your First Arm Balance: A Step-by-Step Guide to Crow Pose
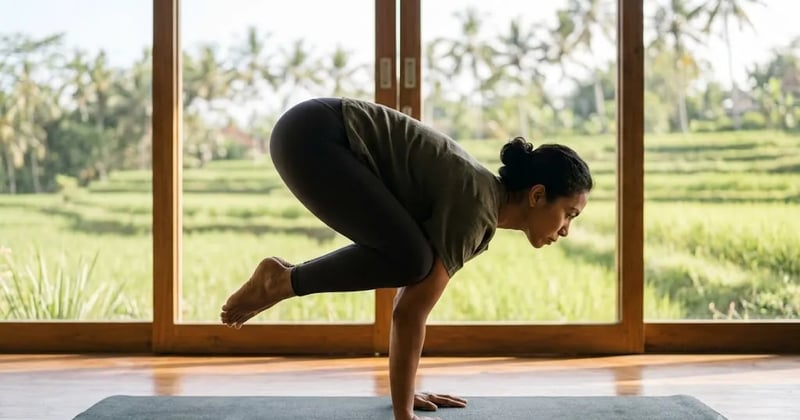
Crow Pose, or Bakasana, is most people’s first arm balance, and it looks harder than it is. It relies far more on technique and core engagement than on raw arm strength. With the right steps, most people can find their balance sooner than they expect.
Good foundational alignment carries over between poses. If your Downward Dog alignment is solid, Crow will come more easily, and it is worth knowing how yoga strengthens athletes in exactly this kind of full-body control.
Prepare the Foundations
Crow asks for three things: open hips, an engaged core, and steady hands. Spend time in Malasana (a deep squat) to open the hips, and practise drawing the navel to the spine to wake up the core. Plank and Chaturanga build the arm and shoulder stability you will lean on. If folding deep enough to set up feels impossible, tight hamstrings are usually the real culprit.
Step by Step
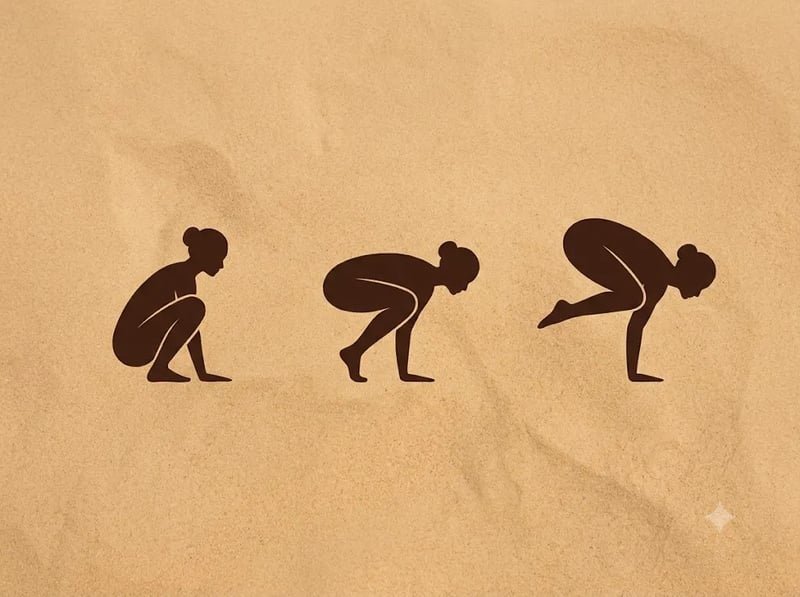
1. Squat with your feet close together and place your hands flat on the floor, shoulder width apart, fingers spread.
2. Bend your elbows straight back, not out to the sides, creating a shelf with your upper arms.
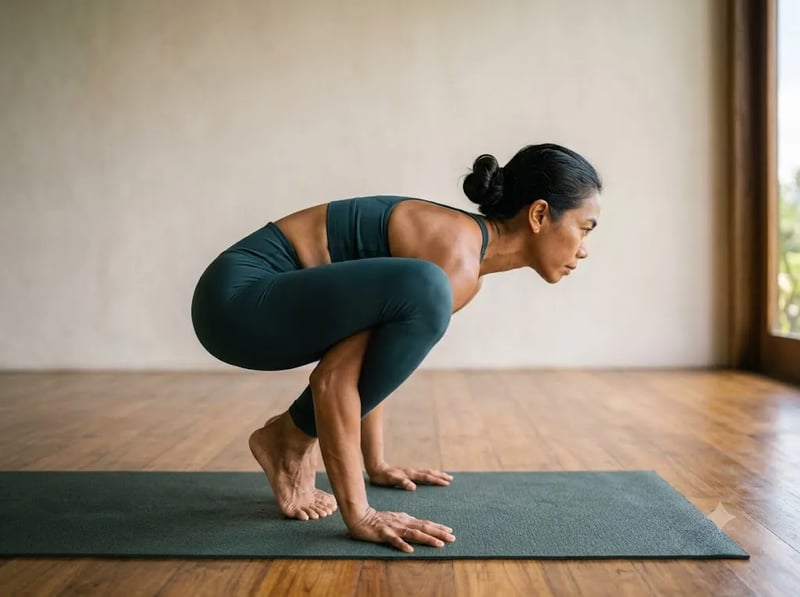
3. Rise onto the balls of your feet and place your knees high onto the backs of your upper arms, near the armpits.
4. Round your upper back, look slightly forward, and shift your weight into your hands.
5. Lift one foot, then the other, drawing your heels toward your seat. Keep the gaze forward, not down.
Working Past the Fear
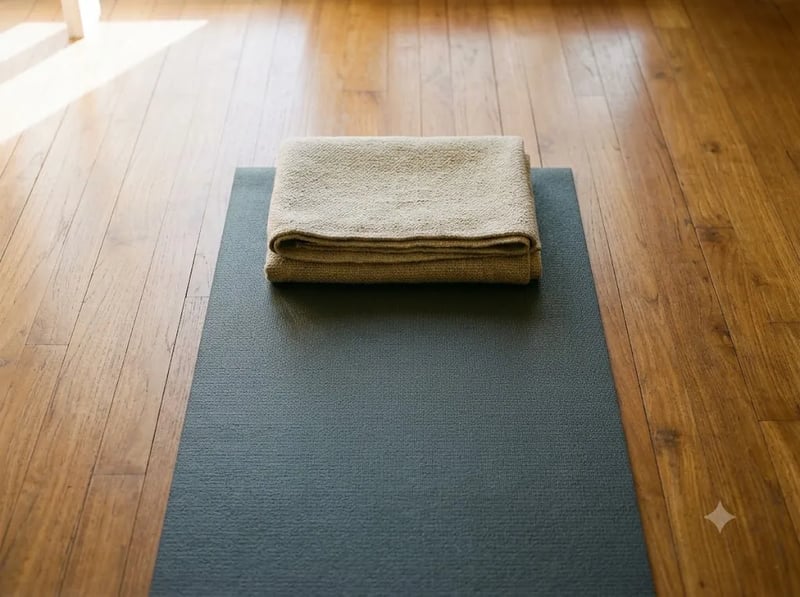
The fear of falling on your face is the biggest obstacle, not strength. Place a cushion or folded blanket in front of you. Knowing you can tip forward safely lets you commit your weight, which is exactly what the balance requires. Look forward, not at the floor, since your body follows your gaze.
The strength and the technique it takes
Crow pose is often sold as a feat of arm strength, and that framing is why so many people stall on it. Arm strength matters, but the pose is mostly about where you put your weight and what your core does with it. Strong arms will not save a body that keeps its weight behind the hands.
The load lands on the wrists and hands, so the same hand mechanics that protect you in other weight-bearing poses apply here: fingers spread wide, weight through the finger pads, the mat gripped lightly so the wrist is not taking the whole load at a sharp angle. Weak or cranky wrists are worth addressing before you chase the balance, because they are the first thing to complain.
The engine of the pose is the core and the rounding of the upper back. You are not holding a flat, neutral spine; you are actively rounding through the upper back and drawing the lower belly in, which lifts the hips and lets the knees settle high onto the backs of the upper arms. Think of pushing the floor away and doming the spine towards the ceiling.
The gaze is the detail that quietly decides the outcome. Look forward, to a point on the floor slightly ahead of your hands, not straight down between them. Where the eyes go, the weight follows, and looking down pulls your centre of mass backwards, which is exactly the direction that tips you out of the pose.
Falling safely and setting up your space
Most of the fear around crow is a fear of pitching forward onto your face, and it is a reasonable fear that has a simple answer. Set the space up so that a fall is boring rather than frightening, and the nervous system stops fighting you.
Place a folded blanket or a cushion on the floor just beyond your hands, where your head would go. Knowing there is something soft there removes most of the hesitation, and hesitation is what keeps people from shifting enough weight forward to actually balance. Ironically, the cushion often makes you fall less, because you finally commit.
Learn the exit before you need it. If you tip too far, tuck your chin towards your chest and roll onto your upper back or simply step one foot down; you do not have to stay rigid and crash. Practising that tuck a few times deliberately, at low height, teaches your body that a mistake is survivable and undramatic.
You can also lower the stakes with height. Standing on a block and hopping the hips up over the hands shortens the distance you could fall and makes the whole thing feel manageable. There is no prize for learning this the scary way.
Drills that build the pose
Crow is best learned in pieces, and each piece is a pose in its own right. Rushing straight to the full expression usually means practising the balance badly, whereas the drills build the exact strength and position you need without the fear tax.
Start with the setup itself: squat down, plant the hands, and lift the hips high with the knees resting onto the backs of the upper arms, keeping the toes on the floor. Just holding that, breathing, and feeling the weight tip gently into the hands teaches the shape before you ever leave the ground. Rock the weight forward and back so you learn where the tipping point actually is.
Then work one foot at a time. From the setup, lift just one foot off the floor for a breath, then swap, so you are only ever risking a small shift rather than launching both feet at once. This builds the specific core and shoulder control the pose needs and it is far less intimidating than the all-or-nothing jump.
Away from the pose, the useful strength work is straightforward: plank holds for shoulder and core endurance, and gentle wrist preparation so the joints tolerate the load. A short list of consistent basics beats a long, complicated routine you will not repeat.
- Setup hold with toes down, rocking the weight forward and back, five slow breaths.
- One foot lifted, then the other, a breath on each side.
- Plank holds for shoulder and core endurance.
- Wrist mobility and light loading before you practise.
A realistic timeline for getting there
The honest answer to how long crow takes is that it varies enormously, and comparing your timeline to anyone else’s is a waste of energy. Some people with existing upper-body strength find the balance in a week or two; others spend a few months building the wrist tolerance and core control first. Both are completely normal.
The variable that matters most is not talent, it is consistent, unhurried practice. A few minutes of the drills several times a week will get you there faster than a single long, frustrated session where you throw yourself at the full pose over and over. Frustration also tightens the body and shortens the breath, which makes balancing harder, not easier.
Keep your expectations off the calendar and on the process. If your setup hold is steadier this week than last, or you held one foot up for a breath longer, that is the progress; the day both feet lift and stay is just the sum of those smaller wins. Bodies adapt on their own schedule.
Learning arm balances well, with the anatomy and the fear both handled properly, is exactly the kind of thing a good teacher training builds methodically over weeks. If you want that structured, safe progression under experienced eyes, it sits at the heart of our 200-hour yoga teacher training. In the meantime, a strong, well-understood downward dog is the best foundation you can bring to it, and our guide to doing downward dog with correct shoulder and wrist mechanics covers the load-bearing basics crow depends on. And if watching others nail it first stings a little, our take on why comparison can be a good thing reframes that feeling.
A four-week approach to the strength it asks for
Most people attempting this pose have the mobility for it and not yet the specific strength, which is why the common experience is tipping forward, catching the floor and concluding it needs more courage. Fear is real, and it is usually the second problem. The first is that a few specific things are not yet strong enough to hold the shape.
Week one is about the hands and the shape of the upper back. Spend it on the plank position and on lifting between the shoulder blades while pressing the floor away, thirty seconds at a time, four or five rounds, three days a week. Add wrist preparation before and after, moving them gently through their full range under a little load. Wrists are the most common thing to be underprepared here, and they are also the slowest to rebuild once irritated.
Week two adds the squeeze. Practise a deep squat with the knees pressed firmly into the outside of the upper arms, taking no weight through the hands, and hold for twenty to thirty seconds. This is the exact connection the pose depends on and it can be trained entirely on the ground. If your knees slide down the arms in the pose, this is why.
Week three works the tipping point. From the squat, place the hands, bend the elbows slightly, and shift weight forward until one foot becomes light. Then come back. Do not try to lift both. Ten repetitions of shifting forward and returning teaches your body where the balance point actually is, which is information you cannot get from a single attempt at the full pose.
Week four is the attempt, with a block under the forehead and a cushion in front of you. The block gives you something to meet if you go too far, which does more for the fear than any amount of resolve, because the fear is a reasonable response to an unprotected fall onto your face. Remove the protection once the shape is reliable rather than before.
Two things to hold to throughout. Bent elbows are not a lesser version, they are the version that works, and straightening them is a later refinement rather than the goal. And stop for the day when your wrists start talking to you, because wrist irritation from this pose takes weeks to settle and will cost you far more time than the session you cut short.
Learn to land before you learn to lift. If you go past the balance point, the safe response is to tuck your chin and roll forward onto your upper back, not to put a hand out or straighten your neck. Practise that roll deliberately from a low squat onto a folded blanket a few times, so your body has done it before it needs to. Knowing you have a rehearsed exit removes most of the hesitation that keeps people from committing, and hesitation is itself a cause of falls here, because a half-committed attempt puts you in the worst position.
Looking after your wrists in crow pose
Crow pose loads the wrists close to full extension while most of your body weight sits above them. If your wrists ache the day after, that is usually a question of load and dose rather than damage, but it is a signal worth respecting rather than training through.
Warm the joint before you weight it. Thirty seconds of slow circles in both directions, then gentle flexion and extension with the fingers pointing back towards you, prepares the tissue far better than launching into the pose from cold.
Then change how you spread the pressure. Most people dump their weight into the heel of the hand and leave it there. Spread the fingers wide, press down through the base of the index finger and thumb, and lift lightly through the centre of the palm. That grip moves load off the wrist joint and into the forearm muscles, where it belongs.
If the angle itself is the problem, reduce it. Wedging the heels of your hands on a folded edge of the mat, or working on parallel blocks, cuts the extension your wrists have to tolerate while you keep building everything else. Fists on the floor with straight wrists is another option, and it teaches the same balance.
Desk work is part of the picture too. Hours of typing hold the wrists in a narrow range all day, and a short daily sequence such as these poses you can do at your desk will do more for your tolerance than the two minutes of shaking your hands out before class.
Get it looked at if the pain is sharp, sits on the little-finger side of the wrist, or persists for more than a week after you back the practice off. Pins and needles into the fingers belongs in the same category. Those are worth a physiotherapist, not a stronger will.
Wrist loading is one of the things we spend real time on in our 200-hour yoga teacher training in Bali, because a teacher who understands it can keep a whole room out of trouble.
Train With Loka
Arm balances reward a real understanding of leverage and core mechanics. Our Online Yoga Mechanics Course shows you how balance and strength actually work, so postures like this click into place. Ready to go deeper? Our 200-Hour Yoga Teacher Training builds the full foundation, starting with the two most important steps in yoga.
Frequently Asked Questions
Do I need strong arms for Crow Pose?
Less than you think. Core engagement, hip position, and technique matter more than arm strength.
How do I stop falling forward?
Look forward, not down, and engage your core to draw the heels toward your seat. A cushion in front removes the fear.
Why can't I lift my feet?
Usually the knees are too low on the arms or the gaze is dropping. Set the knees high near the armpits and keep looking forward.
Is Crow Pose safe for beginners?
Yes, with preparation and a cushion for safety. Build the squat, core, and plank work first.
Why do I keep falling backwards in crow pose?
Almost always because your weight is staying behind your hands and your gaze is dropping down. Look forward to a point slightly ahead of your hands, round the upper back, and shift your weight further forward than feels comfortable. Falling backwards means you have not committed enough weight into the hands, not that you are too weak.
How long does it take to learn crow pose?
Anywhere from a couple of weeks to a few months, depending on your starting wrist and core strength. The biggest factor is consistent short practice of the lead-up drills rather than repeatedly attempting the full pose. Track steadier setup holds and longer single-foot lifts as your real progress markers.
The Loka Newsletter
Enliven your routine with exclusive spiritual content. There’s so much to learn.

Find us on Instagram
@lokayogaschool